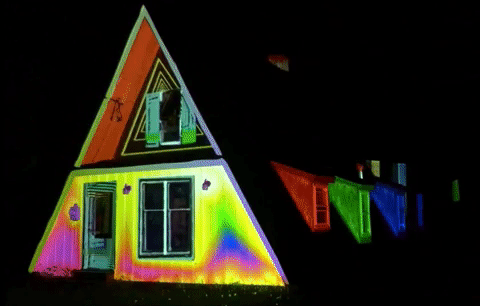
- Bright (high-lumen) projectors are ideal to use with the LFC Kit for house mapping. A projector with a minimum of 3,000 lumens is a good starting point for a single-story house. A brighter projector >5,0000 lumens is recommended for projecting on larger homes.
- An optimal position for the LFC Kit and projector is an important consideration when setting up your scene. There are a few things that will determine what that optimal position will be, or what projector will work best in your space.
- Dimensions of the area of the house you want to project onto should be measured. Keep in mind that the larger that area is, the more lumens you will need to achieve a bright projection. Similarly, the larger the area is, the larger the individual pixels will be in your projection, so you’ll want at least 1080p resolution, if not 4k, to maintain clarity and detail.
- Throw ratio and aspect ratio of the projector will help you determine the distance between your projector and your house to achieve the scale you want. Throw Ratio is the distance between the projector and the frame divided by the projected frame’s width.
Throw Ratio = Throw Distance / Image Width

The lower the throw ratio is, the closer the projector can be, the higher it is, the further the projector can be. LFC supports throw ratios between 0.5:1-2.0:1. The aspect ratio is the relation of the projected frame’s width to the projected frame’s height. The majority of projectors have an aspect ratio of 16:9, like a widescreen monitor or TV, but some have 4:3 aspect ratios. If your house is close to being as tall as it is wide, a 4:3 aspect ratio might be useful. - Throw distances and focal ranges are listed by projector manufacturers to help you determine where they can be positioned while calculating screen size. Like a camera lens, projector lenses cannot focus on everything at once. The throw distance will tell you how close and how far the limits of that focus will be. Unlike camera lenses, some projector lenses don’t focus to infinity, and there will be a maximum distance they can be before creating a blurry picture. The focal range will tell you how wide the area will be in focus at any given time. If your projector has a wider focal range, it will provide greater flexibility when placing your projector at an angle, allowing you to keep focus through a larger section of your projection’s entire depth.
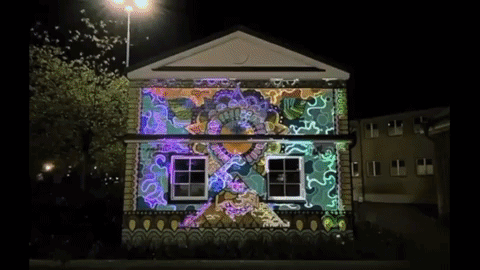
- The alignment of the LFC Kit camera and the projector lens is an important part of any setup. The LFC camera must be able to see and properly focus on the entire subject. To get the best scan results, reference our Guide article Getting a Good Scan. Having a good scan of your house will make it easier to choose different surfaces and insert effects on the different areas in your scene.