Projector Brightness: Understanding Lumens, Luminance, Illuminance, Flux, & More

Projector Brightness: Understanding Lumens, Luminance, Illuminance, Flux, Lux, & Foot-Lamberts

When selecting a projector, people often ask how bright their projector needs to be. To determine the brightness value you need for a new projector, you must first understand how much brightness exists in your scene. For instance, you may need a brighter projector to use during daylight hours versus nighttime to combat the light emitting from the sun. Choosing a projector based on its brightness value begins with understanding the various elements that constitute “brightness.” In this article, we will discuss the relationship between lumens, luminance, and illuminance in hopes of shedding some light on the ambiguity of “projector brightness.”

Lumens vs Lux

The Lumen is a unit derived from the Candela that we use to measure the total amount of luminous flux, or visible radiation, emitted from a light source. Flux comes from the Latin for flow. We use it to describe all sorts of things that move through space, like fluids and gases. Light is a wave and a particle that flows through the world faster than any other known phenomenon. Think of a projector’s luminous flux as a different fluid, it’s behavior is not exactly the same but it’s similar enough for comparison. If you have a garden hose that can spray 1 liter of water every second, you really only know how much water there is. You do not know how far your hose can spray, how wide an area you can cover at once, whether the water will be bouncing off of cement, seeping into the dirt, or whether that area is already so wet that more water won’t even register.

Brightness is relative; it’s not the same thing as luminous output, our eyes are an enormous variable. Our brain interprets light differently in different ambient lighting conditions, and the reflections, refractions, and diffractions that may occur as light flows towards your eyes will all contribute to your brain’s perception of brightness. We don’t perceive incremental differences linearly either – in an enclosed room illuminated by a single light source at 1% of its total output, that light will generally appear to the human eye as 15-20% brighter than it appears to measurement tools.

Consider a flashlight with a single brightness setting. Outdoors in the daylight, you probably won’t be able to see any of its light. Take that flashlight inside and it will become a bit more apparent. In the dark though, it will appear much brighter – sometimes too bright. If you can zoom or focus the beam of your flashlight in the dark, or change the angle of the beam so that it glances off a surface instead of hitting it perpendicularly, you’ll also notice that as the same amount of light spreads out over a larger area, the less bright the illuminated area becomes. The same is true if you move further away without adjusting the optics.

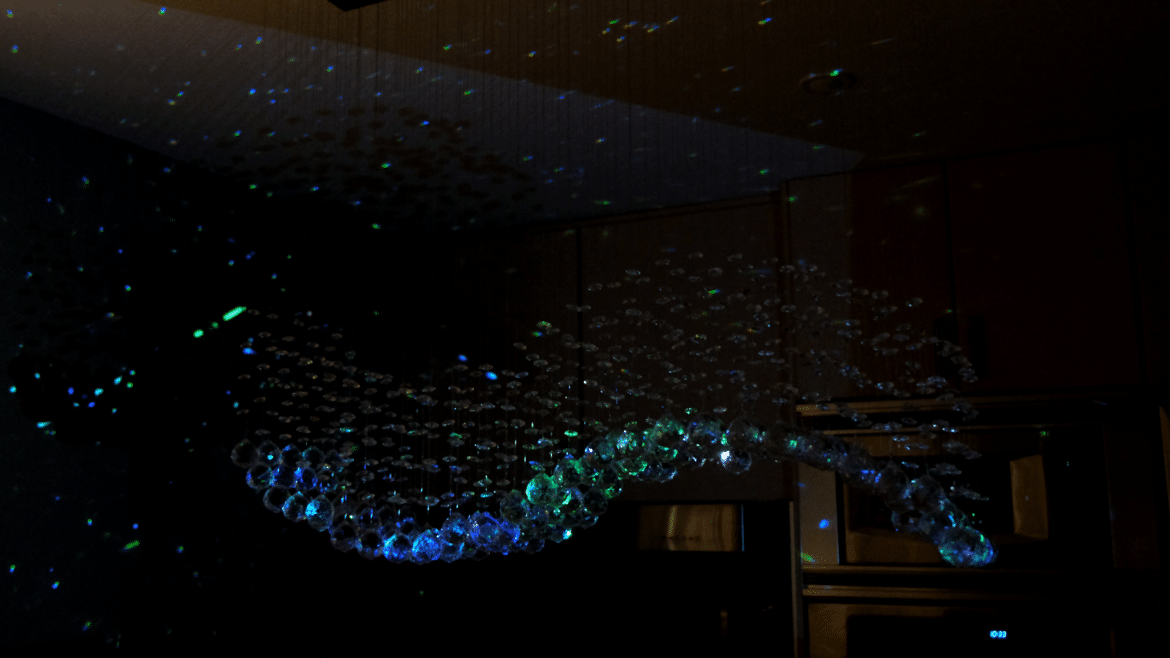
Light emitting from a starry night sky in Joshua Tree.

Like flashlights, projectors use optics to create a beam of light, in a projector’s case a highly controlled beam with a defined geometry. Because lumen ratings are used to describe a light source’s total output, they do not tell you anything about the angle or direction of that beam and how it will spread out over distance or the reflective properties of the surfaces it will interact with. As the distance increases, the beam spreads out, and the total lumens are spread out to illuminate a larger area, albeit with less intensity. The density of light falling onto an area, or illuminance, is most commonly described using the SI unit lux (lx), which measures lumens per square meter. In the United States, many industry-backed standards and municipal codes use the Foot-Candle (fc), or lumens per square feet. As math and history would have it, 1fc = 10.76lx, and multiplying or dividing by 10 to convert between them is close enough for most situations in the range you’ll be dealing with.

Even in the United States, however, lux is becoming increasingly common, particularly with lighting equipment. LED lighting panels, for example, list both their beam angle and how many lux of illumination that beam will produce at specific distances. One of the driving concepts behind lighting design across disciplines is the Inverse-Square Law, otherwise known as fall-off. As light flows through space, it spreads out over a distance. The further that distance, the more spread out the lumens become, meaning less illumination when they do finally reach a surface. Lux tells us much more about how bright any given number of lumens will appear to be versus the number of lumens alone, but you’ll need to know a little bit about the geometry of your scene, as well as how much ambient illumination there is.

As an example, if you were to measure and compare the number of lumens hitting a 1m2 section of wall with a projector positioned 2m away, versus that same projector at 4m away, you would find the section of wall at the 4m distance receives fewer lumens from the projector, and therefore a lower lux value as the total output of light is spread over a greater surface area. When you’re trying to determine how many lumens your projector will need, knowing how large your scene will be and how much ambient light there is will make it much easier.

You can measure your space’s ambient lighting in lux with a light meter if you have one, or you can use a digital camera as a light meter, but you can also download any number of apps that will give you an accurate reading on your smartphone. Take some incident light readings in different situations, and you’ll get a better sense of what these numbers mean in relation to what your eyes are perceiving, keep in mind that you are measuring lumens within an area. If you don’t have access to the space to take a reading, there are lighting standards and recommendations for how illuminated a given space should be based on its function, from a living room, to an office, tradeshow, or warehouse, etc that you can reference. If you’re projecting outdoors in a developed area, the local code book will likely tell you what the level of street light illumination should be.

As for how many lux of illumination you’ll want from your projector, we recommend starting with at least 5x the level of ambient lux. The higher the level of illumination your projector is capable of, the more your projection will stand out against the background. The ideal level of illumination is largely subjective, so don’t worry about it too much. That being said, as part of your creative lighting toolkit, it’s usually better to have too many lumens and have to turn the projector brightness down or add additional lighting, than it is to not have enough.

Once you know the ambient lux levels, you can estimate what you’ll need from your projector by determining how large your scene will be. Keep in mind that projectors come in different aspect ratios, like televisions and monitors, if you’re not sure what that means, you’ll find more information below. More than likely you will be working in a 16:9 or 16:10 aspect ratio, meaning that for every 16 units of width, your projected image will be 9 or 10 units tall.

Say you wanted to project on a 4-meter tall mural and your projector has an aspect ratio of 16:9. That means the horizontal width of your projection will be 7.11 meters. With projection mapping, you don’t need to be set up perpendicular to your subject, in which case your frame might be more of a trapezoid than a rectangle, but for the sake of simplicity let’s assume that we are projecting head-on. When we multiply 4m x 7.11m we have a total projected area of 28.44 square meters. Once we know the area of the projection, we can easily calculate the average lux that any given lumen rating will produce within that area by dividing our total light output in lumens by the projected area those lumens will illuminate. 1000 lumens will produce an average of 35.2 lux at that size, 5000 lumens will produce an average of 175.8 lux, and 10,000 lumens will produce an average of 351.6 lux of illumination. If your projected area was only half that size, each of those lumen ratings would produce twice as many lux, and if your projected area was only a quarter of that size, each lumen rating would produce four times as many lux of illumination, and so on.

Any one of those projectors pointed at a white wall will appear much brighter than if pointed at a black wall, as the amount of light reflecting to your eye changes based on the reflecting surface’s properties. The materials in the scene you’re projection mapping will all have different levels of luminance or emittance, which tells us how bright or intense they appear to our eyes. In photometry, luminance refers to both reflected light and light emitted directly from a source, like the screen you’re using to read this. The imperial unit of luminance, the foot-lambert (fL), measures candela/ft2 and the SI unit is simply candela/m2although it is more and more frequently referred to as a nit. You won’t necessarily be using these units in any practical way with projection mapping, but you may notice them on the Projector Central calculator, so it’s worth noting that while their brightness calculator can be helpful, it’s primarily focused on helping you meet the Society of Motion Picture and Television Engineers’ recommendations for cinema screens.

If you’re working with a material or projection coating like ScreenGoo that has a known gain number, the Projector Central tool can help you estimate luminance in nits or fL, but otherwise, we recommend using the Lightform Projection Mapping Calculator to determine whether a given projector produces enough lumens for your scene.

Industry Standards and Marketing Ploys

While there is a SMPTE Standard for cinema projection, there is no such industry-backed standard for projection mapping at this time. There are, however, many standards that govern different aspects of the tools that we employ. No matter what mode of projection you’re trying to equip yourself for, the likelihood that you will encounter purposefully misleading and unscrupulous marketing is unfortunately quite high.

The baseline measurement that has been adopted is ANSI lumens, established by the American National Standards Institute’s 1992 document IT7.215. It establishes protocols for setting up a projector at a specific distance in a controlled ambient environment, adjusting the brightness and contrast settings of the projector to uniform levels, and then taking readings at nine specific points to calculate an average (often the center of a projection will be brighter than the edges). ANSI lumens are the most commonly found unit in projector specification sheets, and also the most trustworthy. As a general rule, if you see a projector advertised using anything but ANSI lumens, your first reaction should be skepticism. One exception to this rule, which is becoming more common as the technology evolves, is LED lumens, but we’ll go into that in more depth later. You may also see projector brightness described in lux with no other information to contextualize that measurement, which is another misleading marketing tactic.

Color Lumens

An important thing to note about the ANSI lumen standard is that it is measured using black and white video projections. Some projectors are listed with a Color Lumen Rating, which is important for picking a projector for projection mapping. Some projectors might measure high ANSI lumens, but when the same readings are taken on an RGB test pattern, they measure much lower. What this means for the consumer is that the color reproduction of that projector will not be very vibrant. Color Lumens are a good indicator of how vivid the colors of your projection will appear and should be as close or to the ANSI lumen rating as possible for the richest color quality.

Using Your Knowledge of Projector Brightness

Now that you have a better understanding of the many facets of brightness, you can select a projector with greater precision. To aid in that process, the Lightform Projection Mapping Calculator is a great resource to help you determine the brightness needed for your installation. For more information on projector brightness and selecting the right projector to use for your projection mapping project, read our blog on How to Pick a Projector.

~ Sean Servis

Note: 

As of August 12th, 2022, Lightform is no longer in business and is no longer providing technical support for the product. Please refer to the Lightform Guide and FAQ for self-help resources.

Lightform Compatible Projector: How To Pick a Projector

Compatible projector - How to pick a projector

Picking a compatible projector to use with the Lightform LFC to begin projection mapping can be daunting. To make it easier for you to get started, we’ve detailed what considerations you should consider when picking a projector. Recommending projectors can be tricky business as models change quite frequently, but these core features will help you get the most out of your Lightform LFC Kit.

The Basics

Choosing the right projector is going to revolve around brightness and image size. As brightness and image size increase, so does the price of a projector. As you begin your search for a projector to pair with your LFC, you should expect to spend at least $500 for a new projector. Top-of-the-line professional units can easily run into the tens of thousands of dollars, and large-scale projection mapping projects can employ dozens or even hundreds of these high-end units. As the number of available options continues to grow, selecting a projector has not become any easier. We hope to demystify some of the terms and features to help you effectively narrow down your search. Here are a few things to consider when selecting a projector for your LFC.

Table of Contents

Quick Tip: Helpful Resources

Here are a few resources we use internally to select the right projector for our projection mapping projects.

  1. Lightform’s Projection Mapping Calculator is a useful resource to help you determine the brightness necessary for your installation.
  2. Find a Projector search tool via the Projector Central website makes it easy to find a compatible projector for the LFC. We have pre-filled in the search tool with the HDMI and throw ratio requirements to narrow down your choices for finding a compatible projector for the LFC. 
  3. Projector Throw Distance Calculator via the Projector Central website helps determine image size and throw distance.

Projector Requirements

The LFC supports projectors that meet the following criteria:

1. HDMI Input

Your projector must have an HDMI input to work with the LFC Kit. The LFC’s HDMI port is responsible for transmitting video data and the projector’s EDID, or Extended Display Identification Data. The EDID relays different characteristics about the projector, such as resolution, timing, and refresh rates, which the LFC needs to communicate with the projector properly. Some powered VGA and DVI converters work with some projectors even though they are not officially supported.

2. Contrast Ratio, Black Levels, and Projection Mapping

The contrast ratio and black levels of your projector are one of the most important elements to consider for projection mapping. We recommend a minimum contrast ratio of 10,000:1, particularly if you intend to project anywhere relatively dark. Higher contrast ratios will give you better results, and greater flexibility in dark situations, but will also increase the price.

Why does it matter?

Traditional projection, whether in a cinema or in your living room, emphasizes a rectangular image frame. Projection mapping, on the other hand, turns any 3D surface into an image frame. Projection mapping is like many special effects and compositing techniques; it relies on black background areas to selectively illuminate your scene. No matter how your projector creates an image, it cannot produce or project darkness, it can only attempt to divert or block light from illuminating the dark areas of your image.

Projector compatibility - how to pick a projector
A scan in Lightform Creator with surfaces and effect.
Compatible projector - how to pick a projector
The published Lightform video being played by the projector.

Some projectors can block light better than others, which results in higher contrast images and deeper black tones. Projectors that do not block light as effectively produce flatter, more washed out images, especially in dark environments. In a cinema application, you have the option to use specialized high gain black screens to compensate for a low contrast ratio, but in most projection mapping situations, this will not be the case.

The contrast levels of your projector will affect how visible the edges of your image frame will be when projecting black video, and how much your projection will “pop.” If your projection is significantly brighter than the ambient lighting, this image boundary will be more apparent with a lower contrast ratio, particularly when projecting onto flat surfaces. You can always add more ambient light to compensate, but a higher contrast ratio will help avoid some of these situations and make your projections more vivid in general.

Projector compatibility - how to pick a projector
Visible projection frame in low light using an Epson 1060 with 15000:1 Contrast Ratio and 3100 lumens.
Unfortunately, contrast ratio is a projector specification that is obfuscated by competing measurement methods and exaggerated marketing. ANSI contrast measurements are a more reliable measurement but are not universally used. The contrast ratio is defined as the brightness of the projected white video compared to the projected black video. When you see 15,000:1, that means that the white video measures 15,000 times brighter than the black video. The higher the ratio is, the more contrast there will be. But again, these numbers are sometimes inflated in marketing materials, or low ratios might be accompanied by misleading images, so if you are in doubt, search the reviews and specs.

3. “Brightness” - Lumens and More

How bright does my projector need to be? – This is often the first question people ask. The answer depends on a few different factors that will be unique to each individual situation. What we often casually refer to as projector “brightness” is its Lumen rating. In most cases, the LFC supports almost any projector with any normal or short-throw projector with 1000-100,000 lumens. Generally speaking, the larger your scene and the brighter the ambient lighting is, the brighter your projector will need to be, and as the brightness increases, so does the cost. The more ambient light present in your scene, and the larger your scene is, the more light you’ll want your projector to produce.
It’s usually better to have too many lumens and have to turn the projector brightness down or add additional lighting, than it is to not have enough.

To better understand projector brightness there are a few other concepts to familiarize yourself with. There is more to brightness than just lumens. Learn more about the other elements of brightness in our blog about lumens, luminance, illuminance, flux, lux, and foot-lamberts.

We recommend using the Lightform Projection Mapping Calculator to determine whether a given projector produces enough lumens for your scene.

4. Throw Ratio and Lenses

At this point we’ve talked about lumens and lux and how they relate to the illumination levels of your projected image at different sizes, but we haven’t explained how to determine the size of your projection, or how close or far your projector can be to achieve that image size.

The projector lens is a central component of creating a projected image. Similar to camera lenses, projector lenses are designed for specialized uses. A lens that works in one scenario will be the wrong tool in another. Outside of large event and venue projectors, most projectors are manufactured to be used in medium and large rooms. Short throw projectors are made with wide lenses designed to be placed close to the image plane and create a large picture frame. Long-throw projectors are designed to be placed at a distance while still creating an equivalent size frame.

Short and long-throw projectors are determined by throw ratio. To fully understand how and why Lightform works with these different projector types, we need to understand what Throw Ratio is.

Throw Ratio is defined as the size of your projected frame in relation to the distance between your frame and the projector. Like any ratio, it’s a simple division formula, the width (W) of the image frame is divided by the distance (D) between the frame and the projector. You will sometimes see Throw Ratio, or TR, written as a traditional ratio (e.g., 1.5:1), but oftentimes TR specs will exclude the :1 at the end.

The lower the TR number, the wider the picture frame, or the shorter the projector’s throw.

A projector with a throw ratio of 0.5:1 will create a frame that is twice as wide as the distance between the projector and the wall; at a 1m distance, the frame will be 2m wide, at 1.5m distance, the frame will be 3m wide, and so on. A projector with a throw ratio of 2:1 at a 1m distance will create a 0.5m wide frame, at 1.5m, the frame will be 0.75m wide, at 2m distance, the frame will be 1m wide, etc.

Using Throw Ratio

Using the throw ratio equation and its variations is essential when selecting the right projector for your experience – it’s important to consider the positioning of your projector and the size of the image you’d like to project (or the size of the scene you’d like to cover). With the throw ratio equation, you can determine:

1. The ideal throw ratio given the setup of your experience

           TR = TD / IW

           (Throw Ratio = Throw Distance / Image Width)

2. Where to place a projector given its throw ratio & your projected image size

            TD = TR x IW

            (Throw Distance = Throw Ratio x Image Width)

3. The width of the image a projector will produce given its throw ratio & throw distance

            IW = TD / TR

            (Image Width = TD / TR)

Many projector lenses are capable of optical zoom. They don’t have a fixed throw ratio but rather an adjustable one to give you more flexibility to work within your space’s physical constraints. These will be listed as a range, usually with two decimal points (e.g., 1.21-1.56). The greater that range is, the less constrained you will be when choosing your projector’s physical placement, so if you want to make sure you have some flexibility in your installations, that number might be a little more important to you. When looking at higher-end projectors, many of them have interchangeable lenses, which will give you a lot of options to rent or buy lenses with different throws as necessary. Be aware that an interchangeable lens feature can drive up the cost of these systems as they are not always included with every listing.

The Lightform LFC Kit works with projectors having a wide range of throw ratios, from 0.5:1 (short-throw) to 2:1 (long-throw). Two factors determine the throw ratio range that is compatible with the LFC.

Field of View – Lightform LFC’s 4K camera reads a series of visible structure light patterns during the scanning process. At each stage of the scan pattern, Lightform is recording the position of every projector pixel it can see and determining its position within the scene. With short-throw projectors, the LFC’s camera field of view, or FOV, is the limiting factor. If the throw ratio is lower than 0.5:1, the projector image will be too wide for the LFC camera; if the projector image extends beyond the edge of the camera frame, the LFC camera will be unable to detect and register the light from the full scene on its sensor.

Camera Sensor – For long-throw projectors with a throw ratio above 2:1, the 4K sensor on the LFC camera defines the upper limit of optimal compatibility. Lightform Creator’s scans and projects have a maximum resolution of 1920×1200 pixels. Lightform LFC’s 4K camera sensor has a resolution of 3840×2160 pixels, or roughly four times as many pixels as it is responsible for recording during a scan. When the throw ratio of a projector exceeds 2:1, the projector image will be visible to less than ¼ of the available 4K camera sensor pixels (i.e. less than 1920×1200 pixels) resulting in a scan resolution that is lower than the projector’s native resolution.

It is possible to use Lightform LFC with out-of-spec throw ratios beyond the 0.5:1-2:1 range by moving the LFC closer or further away with a long HDMI cable, but ideally, the camera lens should be on the same plane as the projector lens. During the scanning process, the projector lens and the LFC camera lens are essentially acting as two eyes to produce stereo vision. As the difference between the two lens planes increases, the fidelity of the depth disparity data will decrease, which will result in some effects and selection tools not behaving as intended.

It is also possible to modify the LFC camera to accept C and CS mount lenses, which will allow you to change the camera’s field-of-view to better match an out-of-spec throw ratio. This will give you better results than moving the LFC camera, but the conversion and lens will cost more than a long HDMI cable.

5. Throw Distance

Throw distance is the minimum and maximum distance your projector will project in focus. The focusing range of your lens constrains your physical placement options. The minimum distance is how close your projector can be without being out of focus, and the maximum is how far you can be without losing focus.

This does not mean that everything between those extremes will be in focus. How much of that given range will be in focus will vary from projector to projector. If you plan on video mapping a scene with a lot of depth, you’ll want to look for a projector with a larger focal range. In general, projectors are designed to create an image on a flat plane, so this isn’t really something that most listings mention, but often time longer throw ratios will allow for more of the projection to be in focus at one. Most short-throw and ultra-short-throw projectors have very limited focal distances, they are great for planar images close to a wall, but are not designed for scenes with depth.

6. Resolution and Aspect Ratio

Like cameras, televisions, smartphones, and pretty much anything with a screen, projectors come in a wide range of resolutions. Resolution is defined as the width and height dimensions of a digital image in pixels. A pixel is the base unit of modern digital imagery, a discrete point of color and brightness that can be individually addressed as one small part of the larger total image. The higher the number of pixels you have to work with, the more detailed your images will appear.

As you research projectors, you will encounter resolutions listed both in pixel dimensions and also their marketing equivalents, VGA (640×480), SD (720×480), HD (1280×720), Full HD (1920×1080), WUXGA (1920×1200), 2K (2560×1440), UHD/4K (3840×2160) and a few others.

Lightform is compatible with a wide range of projector resolutions and will generate scans and published projects with a resolution up to 1920×1200 (WUXGA). Higher resolutions are one of the features that will bring up the overall cost of a projector and may be worth considering if you intend to work on large scenes or with small text.

While a published Lightform project is limited to 1920×1200, many projectors with greater resolutions can upscale HD video to an approximated 4K image, which will look great with Lightform Creator effects. If you have room left in your projector budget for a projector with 4K upscaling, you will benefit from an overall crisper image with the increased pixel density, particularly if you intend to work with very large scenes.

7. Pixel Density

The screen you’re reading this on likely has an incredibly dense pixel array, no matter what its resolution is. More than likely, it’s at least 1920×1080, if not higher, but those pixels are so small that you can’t distinguish them individually without magnification. Digital projectors create images in standard video resolutions but enlarge them with optical lenses. As a result, individual pixels are much larger than on a phone or monitor. They are more readily perceived at close distances, a phenomenon known as the “screen door effect” because the space between pixels resembles the grid mesh of a physical screen door.

Most large-scale projection mapping projects maintain pixel density by blending multiple high resolution projectors together. If you’ve ever seen video mapping on a large building facade, the total resolution of that projection is significantly larger than any individual projector is capable of producing. Instead, hundreds of thousands of dollars worth of high-end projectors are combined using software to create one enormous seamless image.

The process for a large scale Lightform project is much simpler, but since you won’t be blending multiple projectors, having the highest resolution projector you can afford will give you better pixel density. The more individual pixels you can fit on your projection surface, the more detailed your projections will appear. Viewing distance will also impact perceived resolution as projected experiences viewed from a short distance will reveal pixel density shortcomings. Conversely, projected experiences viewed from further away will conceal pixel density shortcomings like lower resolution billboards viewed from afar.
Pro Tip: It is also possible to mitigate the screen door effect by softening the optical focus of your projector lens, but be sure to keep your projector focused while taking a Lightform scan. Throwing the lens further out of focus can turn your projection into an even more ethereal experience if your content allows for it.

8. Lamps, Lasers, and LEDs

Lamps, laser and LED engines are systems that use optics to split a beam of white light into different colors. Any number of lamp types can create white light (there are quite a few varieties at this point) but they all need replacement after a few thousand hours. For the budget-conscious projector hunter, this means that you can sometimes find used projectors for sale or auction at a steep discount that only need a new lamp installed. However, the newer Laser and LED light sources have some distinct advantages.

Instead of splitting white light into three channels, these projectors start with the RGB channels already separated. In other words, they can reproduce more accurate and vibrant colors with higher contrast. They are also more power-efficient, brighter, and less light is lost to the color-splitting optics resulting in higher contrast and darker blacks. On top of that, they do not require lamp replacements. Most traditional projector lamps have a life expectancy of a couple of thousand hours and have to be replaced. Laser and LED projectors, on the other hand, are usually rated to last around 20,000 hours or more, saving time and money on maintenance.

Laser projectors have also breathed life back into the 1 Chip DLP system. Since they create RGB channels at the light source instead of needing a spinning color wheel, the Rainbow Effect – an artifact of the rapid switching between color channels, where you may see flashes of color in parts of the image with quick movements or high contrast – is no longer an issue, so if you see a 1 Chip DLP Laser projector, it might suit your needs just fine.

Some Laser projectors use a Laser Phosphor as a light source, which still relies on mirrors and color wheels to create an image. A blue laser (and sometimes a second red laser) hits a phosphor wheel, which creates yellow light when the laser photons collide into it, and that yellow light is then routed through the optical engine. These projectors don’t have all the color reproduction advantages of RGB Laser and LED systems but are still brighter and more efficient with no bulb replacements.

LED projectors create vivid colors, but their brightness is hard to qualify. They take advantage of what is known as the Helmholtz-Young effect when the human eye perceives highly saturated color as luminance. To a light meter, an LED projector won’t read as very bright, but their low lumens go a long way as the human brain interprets what is seen as brighter by two or three times the actual lumens. Many LED projectors are sold using marketing LED lumens, an estimation of how many lumens your eyes will see, to counter the low ANSI lumen spec. But there is no standard point of comparison for this so take everything you see with a grain of salt and read the reviews.

9. Imaging Chips

Digital projectors use one of two kinds of imaging chips to turn the video signal from an HDMI cable into a projected video image, 3LCD and DLP. With a couple of exceptions, they will both provide good results with Lightform.

3LCD projectors use dichroic mirrors to channel red, blue, and green light through three small Liquid Crystal Displays, then recombine the color channels with a prism or microlens array, and then project a full image out of the front lens. Each Liquid Crystal corresponds to a pixel; applying electricity to a liquid crystal changes its polarization to control the amount of light that passes through it. Some people find that 3LCD projectors tend to reproduce richer colors, but there is a lot of variance. Keep in mind that a Color Lumen rating similar to the ANSI Lumen rating indicates that a projector will have vibrant color reproduction.

DLP, or Digital Light Processing Chip, creates an image using a DMD, an array of thousands of micro-mirrors that can switch very rapidly between reflecting light towards or away from the lens. Unlike a Liquid Crystal, the micro-mirrors on a DLP chip are a binary on/off output. To create the correct gradations of brightness, multiple mirrors will be assigned to one image pixel, or the mirrors will switch on and off faster than the refresh rate of the video.

The earliest DLP systems used a single Chip DLP configuration, dividing white light into red, green, and blue with a color wheel and then reflecting each color channel off a single DMD one after another. Because the colors are flashing rapidly between color channels instead of being recombined, 1 Chip DLP projectors with a color wheel are prone to the previously discussed Rainbow Effect. Not everyone experiences this the same way, but it will show up on video recordings and still photos. Searching projector reviews for Rainbow Effect is a good habit to get into, and it’s recommended one avoid 1 Chip DLP projectors with color wheels.

3 Chip DLP projectors replaced the spinning color wheel, to eliminate the Rainbow Effect, with dichroic mirrors. Each color channel is directed to a dedicated micro-mirror array simultaneously, similar to the 3LCD configuration.

10. Vertical Offset

Vertical Offset is another feature of projector optics to be aware of when picking a projector. Most projectors are designed to sit on a surface or hang from a ceiling and create a rectilinear frame towards the center of a wall. To account for this, many of them have a 100% Vertical Offset (i.e., shifting the projected frame slightly higher versus directly straight ahead). With a 100% Vertical Offset the bottom of the projected frame will line up with the center of the projector lens, and the top of the projected frame comes out of the projector’s lens at an upward angle. A 0% vertical offset means the beam goes straight out of the lens like a flashlight and the center of the projector frame is in line with the projector lens.

Some projectors have more extreme offsets for particular situations. Higher-end projectors often have a Lens Shift feature, which will allow you to change the Vertical Offset and Horizontal Offset allowing you to move the frame around without distortion. Lens Shift is a great feature to have in physically constrained installations. You can make a vertical offset work to your advantage by installing projectors upside down and illuminating your scene from above. Minimizing occlusion of the projection as people pass in front of the projection surface makes ceiling-mounted projectors a favored installation approach in traditional situations as well as indoor projection mapping

Final Thoughts

There are many factors to weigh when purchasing a projector, and we by no means have covered them all, but we’ve found these have the greatest impact on successful use of Lightform projection mapping. To learn more about specific projectors we recommend conducting research at projectorcentral.com. If you’d like to learn more about Lightform we have several articles in the Lightform Guide that can help you bridge this knowledge to use of Lightform products.

~ Sean Servis

Note: 

As of August 12th, 2022, Lightform is no longer in business and is no longer providing technical support for the product. Please refer to the Lightform Guide and FAQ for self-help resources.