2020 Retrospective: Inspiring Lightform Customer Examples

2020 Lightform Customer Examples

As we close out 2020, we thought it would be nice to reflect on creative and inspiring projects created with Lightform LFC Kits and LF2 AR projectors. In a year dominated by the COVID-19 pandemic and rounded out with social protests to murder hornets, we’ve taken solace in the creativity of the Lightform community. We have curated some noteworthy Lightform customer examples and collaborations that came to fruition this past year. Enjoy!

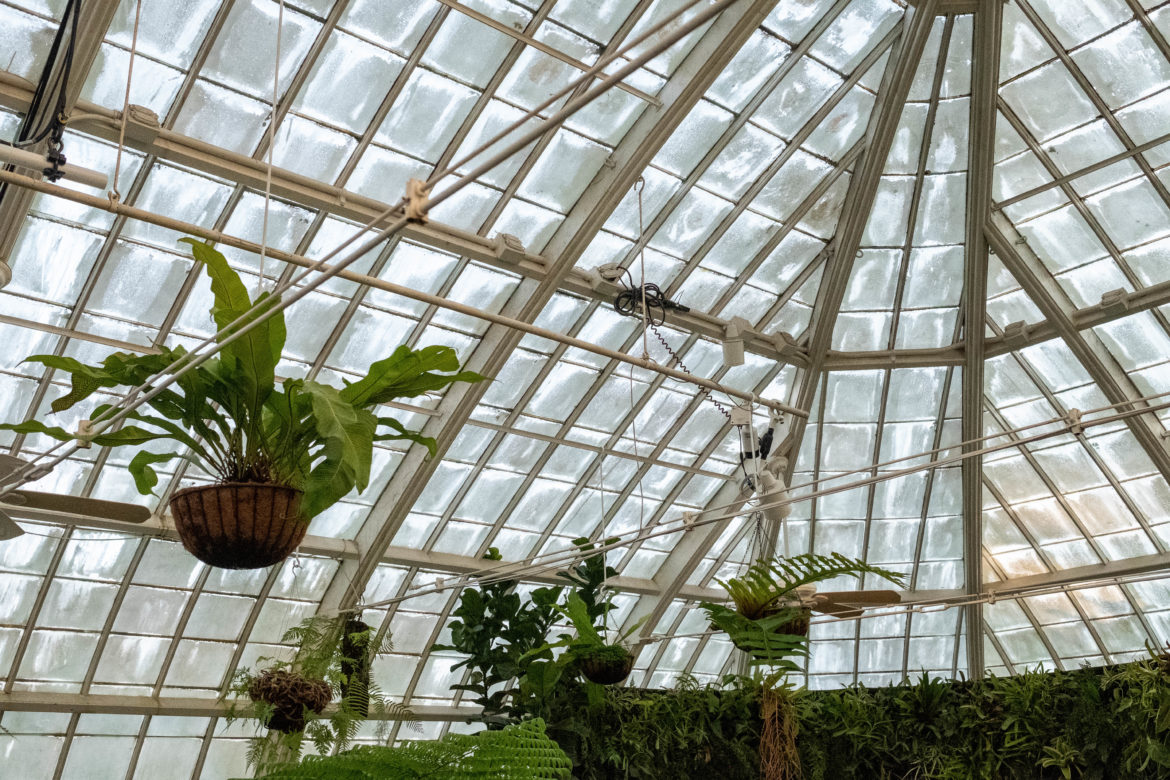
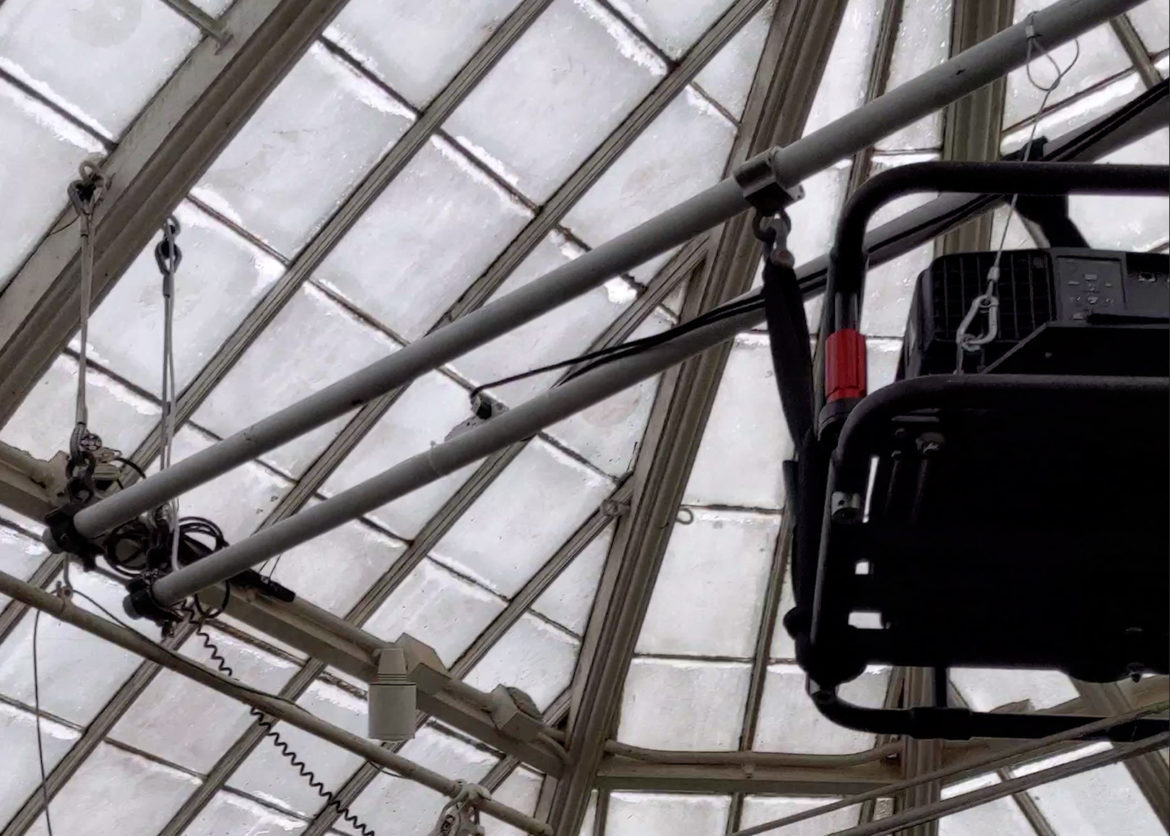
1. Night Bloom at the San Francisco Conservatory of Flowers

At the beginning of the year, we teamed up with the San Francisco Conservatory of Flowers to projection map a plant-immersive light show for their winter event, Night Bloom. From various tropical plants to floating pond grasses, Night Bloom was the perfect plant mapping installation to put the Lightform LFC Kit to the test. After augmenting complex organic textures and creating an ambient, environmental projection mapping show, the exhibit proved to be a success. Read more about the event in our blog and find behind-the-scenes details to our Night Bloom installation.

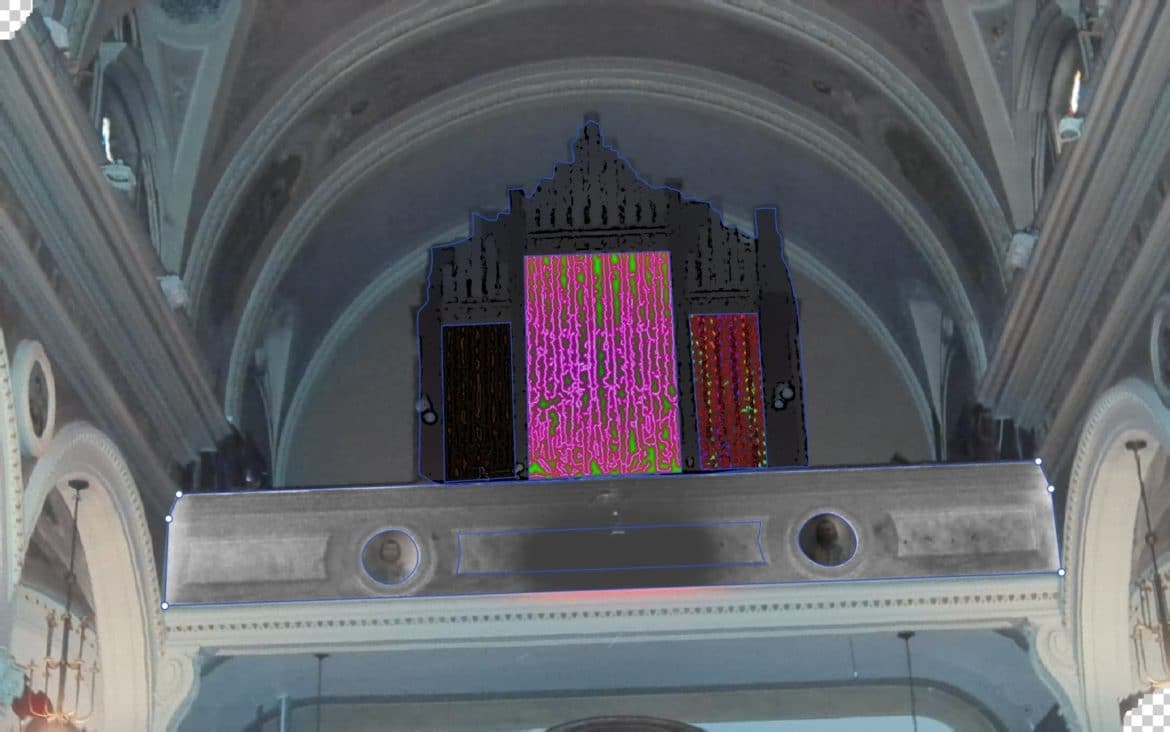
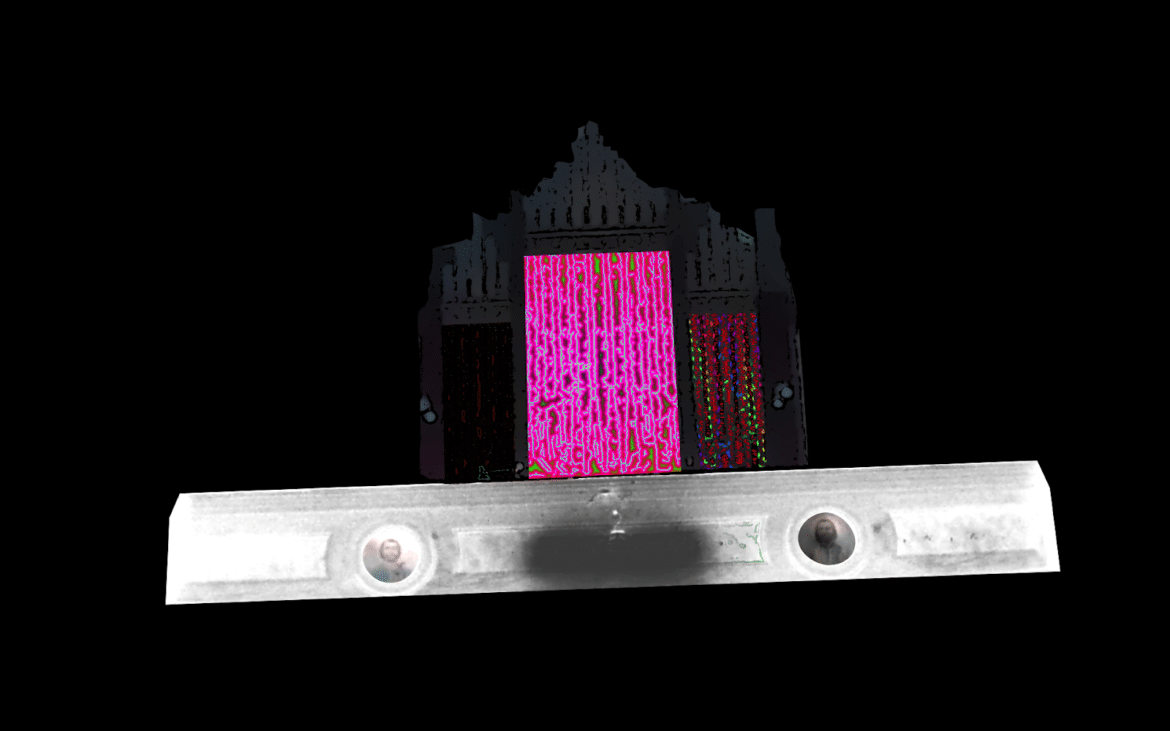
2. A Disney Castle Light Show

As COVID-19 began to restructure our daily routines in early spring, visual artists like Matt Maldonado used his art to inspire entertainment lovers and Disney fans who remained at home during the quarantine. In reminisce of Disney theme parks, Maldonado designed a timeless rendition of Disney favorites through a light show projected onto his handmade, 3D miniature model of the Disney castle. Inspired to keep the Disney magic alive and captivate audiences at home, Maldonado states, “I wanted to create this show for the Disney fans that are not only missing the parks but the magic as well.” In a creative array of classic Disney visuals, Maldonado used the Lightform LFC Kit to cast well-loved characters and Disney clips onto the front of the castle. Spectators of his project are transported to the Haunted Mansion’s eerie halls, launched through a laser-filled Star Wars space battle, and guided into Neverland with Peter Pan and friends as they fly across the castle wall – all while fireworks fill the castle’s night sky backdrop.

3. Social Movement Projections

In response to the Black Lives Matter movement earlier this year, Lightform power-user Ryan McCoy used his LFC Kit to display a progressive social movement projection onto the side of a multi-story building in St. Louis. “I wanted to show my support for the BLM movement and decided to project from a downtown rooftop over to a neighboring building,” says Ryan McCoy in one of our interviews. You can view more of his large-scale work on Facebook.

4. Lightform in Wonderland

In a playful, fantasy-inspired projection mapping project, Playable Agency used Lightform in an interactive, Alice in Wonderland installation. The Wonderland art show featured a mad tea party accompanied by the Cheshire Cat, a flower garden archway and a magical “Drink Me” potion. See more experiences created by Playable Agency on their web site.

5. ‘New Thought / No Thought’ Short Film

Kira Bursky (@allaroundartsy) is a multidisciplinary artist and filmmaker. This spring, Kira participated in the Stuck At Home 48 Hour Film Project, using the LFC Kit to scan her drawings and design the projections featured in her short film. She utilized Lightform Creator’s built-in effects and textures and sourced additional royalty-free animations and clips. In her blog post discussing her filmmaking experience, Kira shares, “I was inspired to tell the story of my mental health journey. Through meditation, I have experienced a shift in my perception of reality. I have pushed beyond what I had once perceived as the extent of reality. It is quite difficult to describe this experience with words, but it is beautiful and life-giving. This film is my attempt to portray that experience.” Read her full story on how to make a short film with Lightform’s projection mapping.

6. L‘esperance’s Lighting Design for an Outdoor Event

Daelen Cory, the creator behind the award-winning design service L’Esperance Designs, has a rich portfolio of historic restorations to futuristic designs. Daelen uses the Lightform LFC Kit to projection map the interior and exterior of his clients’ homes. He created an immersive experience with six LFC Kit devices paired with Panasonic PT-VZ580 series projectors in this project. Daelen and his team transformed the exterior of his client’s property in LA into a mystical wonderland full of color and light. A great example of how the LFC Kit can take lighting design for landscaped outdoor events to the next level. See more of his work on Instagram.

7. Jennifer Deann Scott’s Violin Cover of Hurt by Nine Inch Nails

During the summer, ARWorks Motion Picture Company produced a music video featuring Jennifer Deann Scott in a cover of Hurt by Nine Inch Nails. ARWorks used the LFC Kit with an Epson 1450 projector to projection map the planets and create effects on their surfaces. The LFC was also used for background shots, the water scene in the video, and Jennifer’s live performances. “This was shot over two days in a garage in 95-degree heat here in Denver this past July… All the music was produced by Jennifer from the ground up,” says the producer, Erik Schreiber.

8. “Positive Projections” in Sydney, Australia

Sydney’s city murals came to life this summer with Adam St. John’s portable tricycle setup. Paired with Lightform, Adam’s renegade project consisted of projection mapping various murals throughout Sydney’s inner-west neighborhood. His project, “Positive Projections,” was an effort to highlight local artists’ work to help them paint, animate, and develop newly designed artworks in the city. Discover more of Adam’s work on his YouTube channel.

9. A Thriller Halloween

Jérémy Carre Cube is a video mapper and light programmer from the Alsace region in France. This Halloween, Jérémy used his LFC Kit to projection map a band of jack-o-lanterns singing to Michael Jackson’s notorious track, Thriller. His projection mapped jack-o-lanterns are hosted on a haystack stage with a spooky forest backdrop, with digital fire effects cast onto real firewood as a part of his Halloween show.

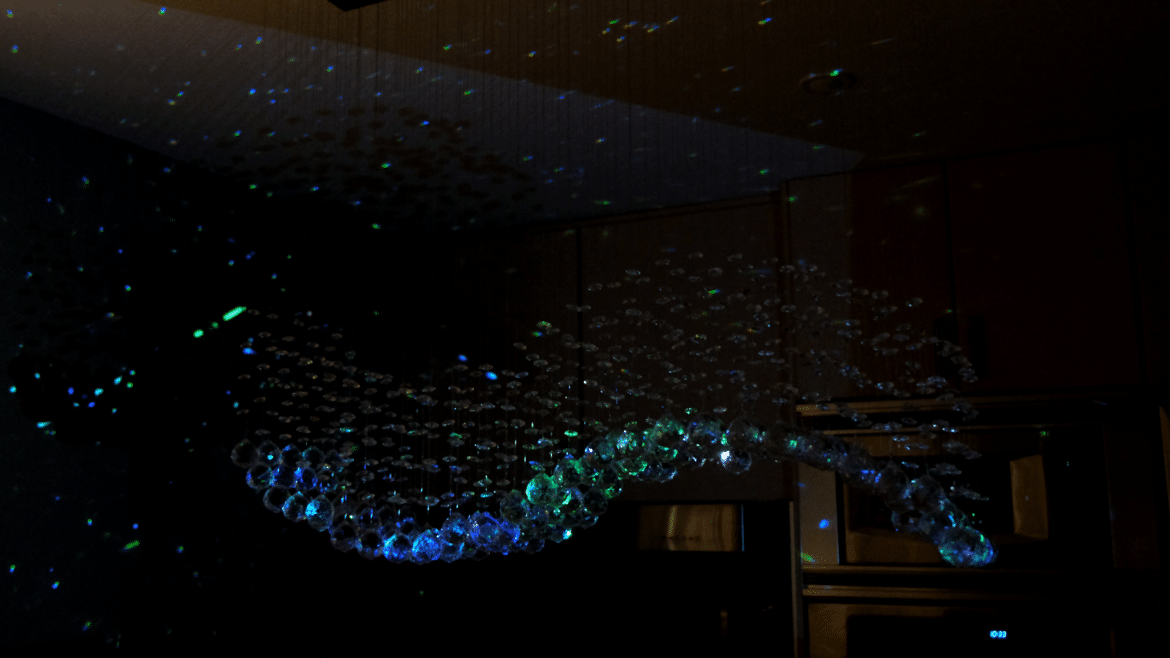
10. A Bioluminescent Light Show in Kahika’s Music Video, Mutual Gathering

This November, Lightform’s projection mapping lit up New Zealand’s wildlife in Kahika’s music video, “Mutual Gathering.” Paired with various aerial shots of Aotearoa, Lightform’s digital effects were used to light up the New Zealand forests, depicting artificial bioluminescence. “Mutual Gathering” is a song about people enjoying and respecting nature. The music video explores the Māori concept of “mana,” a life-force energy that permeates the universe, which is visualized as bioluminescence upon flora & fauna. “These organic forms were filmed real-time, with glowing visuals made possible with a projector, an outdoor generator, and Lightform,” shared Jonathan Hislop, a member of the Kahika trio. Find more of Kahika’s music on Spotify

11. Wall Art Projections

DIY expert Chip Wade from Fox and Friends used his LF2 to demonstrate how to decorate wall art for the holidays without the hassle of hanging lights. Using his LF2, Chip projected his digital projections onto his custom-made, wood, cutout art piece in his house to bring his wall art to life.

12. Christmas Village Diorama

This holiday season, many users in the Lightform community utilized their Lightform to transform ordinary holiday decor into projection mapping light shows. Chris Sardinas used his LFC Kit to light up his Christmas Village diorama, bringing his miniature cafe, fire station, and neighborhood bicycle shop to life.

We’re Eager to See What You Create in 2021

We have seen a flux of creativity and imagination from Lightform users this year, and these are just a few among many remarkable projection mapping projects. From retail display to music videos, Lightform users have found innovative uses for their devices to spur anything from business opportunities to artistry. We hope the content you see from others in the Lightform community inspires you to keep creating and innovating with your Lightform devices.

As always, we want to keep up with your new Lightform creations throughout the upcoming year. Share your projection mapping projects with us by tagging #lightformcreations in your social posts so we can feature your content and continue spreading the projection mapping magic throughout 2021.

Note: 

As of August 12th, 2022, Lightform is no longer in business and is no longer providing technical support for the product. Please refer to the Lightform Guide and FAQ for self-help resources.

Projector Brightness: Understanding Lumens, Luminance, Illuminance, Flux, & More

Projector Brightness: Understanding Lumens, Luminance, Illuminance, Flux, Lux, & Foot-Lamberts

When selecting a projector, people often ask how bright their projector needs to be. To determine the brightness value you need for a new projector, you must first understand how much brightness exists in your scene. For instance, you may need a brighter projector to use during daylight hours versus nighttime to combat the light emitting from the sun. Choosing a projector based on its brightness value begins with understanding the various elements that constitute “brightness.” In this article, we will discuss the relationship between lumens, luminance, and illuminance in hopes of shedding some light on the ambiguity of “projector brightness.”

Lumens vs Lux

The Lumen is a unit derived from the Candela that we use to measure the total amount of luminous flux, or visible radiation, emitted from a light source. Flux comes from the Latin for flow. We use it to describe all sorts of things that move through space, like fluids and gases. Light is a wave and a particle that flows through the world faster than any other known phenomenon. Think of a projector’s luminous flux as a different fluid, it’s behavior is not exactly the same but it’s similar enough for comparison. If you have a garden hose that can spray 1 liter of water every second, you really only know how much water there is. You do not know how far your hose can spray, how wide an area you can cover at once, whether the water will be bouncing off of cement, seeping into the dirt, or whether that area is already so wet that more water won’t even register.

Brightness is relative; it’s not the same thing as luminous output, our eyes are an enormous variable. Our brain interprets light differently in different ambient lighting conditions, and the reflections, refractions, and diffractions that may occur as light flows towards your eyes will all contribute to your brain’s perception of brightness. We don’t perceive incremental differences linearly either – in an enclosed room illuminated by a single light source at 1% of its total output, that light will generally appear to the human eye as 15-20% brighter than it appears to measurement tools.

Consider a flashlight with a single brightness setting. Outdoors in the daylight, you probably won’t be able to see any of its light. Take that flashlight inside and it will become a bit more apparent. In the dark though, it will appear much brighter – sometimes too bright. If you can zoom or focus the beam of your flashlight in the dark, or change the angle of the beam so that it glances off a surface instead of hitting it perpendicularly, you’ll also notice that as the same amount of light spreads out over a larger area, the less bright the illuminated area becomes. The same is true if you move further away without adjusting the optics.

Light emitting from a starry night sky in Joshua Tree.

Like flashlights, projectors use optics to create a beam of light, in a projector’s case a highly controlled beam with a defined geometry. Because lumen ratings are used to describe a light source’s total output, they do not tell you anything about the angle or direction of that beam and how it will spread out over distance or the reflective properties of the surfaces it will interact with. As the distance increases, the beam spreads out, and the total lumens are spread out to illuminate a larger area, albeit with less intensity. The density of light falling onto an area, or illuminance, is most commonly described using the SI unit lux (lx), which measures lumens per square meter. In the United States, many industry-backed standards and municipal codes use the Foot-Candle (fc), or lumens per square feet. As math and history would have it, 1fc = 10.76lx, and multiplying or dividing by 10 to convert between them is close enough for most situations in the range you’ll be dealing with.

Even in the United States, however, lux is becoming increasingly common, particularly with lighting equipment. LED lighting panels, for example, list both their beam angle and how many lux of illumination that beam will produce at specific distances. One of the driving concepts behind lighting design across disciplines is the Inverse-Square Law, otherwise known as fall-off. As light flows through space, it spreads out over a distance. The further that distance, the more spread out the lumens become, meaning less illumination when they do finally reach a surface. Lux tells us much more about how bright any given number of lumens will appear to be versus the number of lumens alone, but you’ll need to know a little bit about the geometry of your scene, as well as how much ambient illumination there is.

As an example, if you were to measure and compare the number of lumens hitting a 1m2 section of wall with a projector positioned 2m away, versus that same projector at 4m away, you would find the section of wall at the 4m distance receives fewer lumens from the projector, and therefore a lower lux value as the total output of light is spread over a greater surface area. When you’re trying to determine how many lumens your projector will need, knowing how large your scene will be and how much ambient light there is will make it much easier.

You can measure your space’s ambient lighting in lux with a light meter if you have one, or you can use a digital camera as a light meter, but you can also download any number of apps that will give you an accurate reading on your smartphone. Take some incident light readings in different situations, and you’ll get a better sense of what these numbers mean in relation to what your eyes are perceiving, keep in mind that you are measuring lumens within an area. If you don’t have access to the space to take a reading, there are lighting standards and recommendations for how illuminated a given space should be based on its function, from a living room, to an office, tradeshow, or warehouse, etc that you can reference. If you’re projecting outdoors in a developed area, the local code book will likely tell you what the level of street light illumination should be.

As for how many lux of illumination you’ll want from your projector, we recommend starting with at least 5x the level of ambient lux. The higher the level of illumination your projector is capable of, the more your projection will stand out against the background. The ideal level of illumination is largely subjective, so don’t worry about it too much. That being said, as part of your creative lighting toolkit, it’s usually better to have too many lumens and have to turn the projector brightness down or add additional lighting, than it is to not have enough.

Once you know the ambient lux levels, you can estimate what you’ll need from your projector by determining how large your scene will be. Keep in mind that projectors come in different aspect ratios, like televisions and monitors, if you’re not sure what that means, you’ll find more information below. More than likely you will be working in a 16:9 or 16:10 aspect ratio, meaning that for every 16 units of width, your projected image will be 9 or 10 units tall.

Say you wanted to project on a 4-meter tall mural and your projector has an aspect ratio of 16:9. That means the horizontal width of your projection will be 7.11 meters. With projection mapping, you don’t need to be set up perpendicular to your subject, in which case your frame might be more of a trapezoid than a rectangle, but for the sake of simplicity let’s assume that we are projecting head-on. When we multiply 4m x 7.11m we have a total projected area of 28.44 square meters. Once we know the area of the projection, we can easily calculate the average lux that any given lumen rating will produce within that area by dividing our total light output in lumens by the projected area those lumens will illuminate. 1000 lumens will produce an average of 35.2 lux at that size, 5000 lumens will produce an average of 175.8 lux, and 10,000 lumens will produce an average of 351.6 lux of illumination. If your projected area was only half that size, each of those lumen ratings would produce twice as many lux, and if your projected area was only a quarter of that size, each lumen rating would produce four times as many lux of illumination, and so on.

Any one of those projectors pointed at a white wall will appear much brighter than if pointed at a black wall, as the amount of light reflecting to your eye changes based on the reflecting surface’s properties. The materials in the scene you’re projection mapping will all have different levels of luminance or emittance, which tells us how bright or intense they appear to our eyes. In photometry, luminance refers to both reflected light and light emitted directly from a source, like the screen you’re using to read this. The imperial unit of luminance, the foot-lambert (fL), measures candela/ft2 and the SI unit is simply candela/m2although it is more and more frequently referred to as a nit. You won’t necessarily be using these units in any practical way with projection mapping, but you may notice them on the Projector Central calculator, so it’s worth noting that while their brightness calculator can be helpful, it’s primarily focused on helping you meet the Society of Motion Picture and Television Engineers’ recommendations for cinema screens.

If you’re working with a material or projection coating like ScreenGoo that has a known gain number, the Projector Central tool can help you estimate luminance in nits or fL, but otherwise, we recommend using the Lightform Projection Mapping Calculator to determine whether a given projector produces enough lumens for your scene.

Industry Standards and Marketing Ploys

While there is a SMPTE Standard for cinema projection, there is no such industry-backed standard for projection mapping at this time. There are, however, many standards that govern different aspects of the tools that we employ. No matter what mode of projection you’re trying to equip yourself for, the likelihood that you will encounter purposefully misleading and unscrupulous marketing is unfortunately quite high.

The baseline measurement that has been adopted is ANSI lumens, established by the American National Standards Institute’s 1992 document IT7.215. It establishes protocols for setting up a projector at a specific distance in a controlled ambient environment, adjusting the brightness and contrast settings of the projector to uniform levels, and then taking readings at nine specific points to calculate an average (often the center of a projection will be brighter than the edges). ANSI lumens are the most commonly found unit in projector specification sheets, and also the most trustworthy. As a general rule, if you see a projector advertised using anything but ANSI lumens, your first reaction should be skepticism. One exception to this rule, which is becoming more common as the technology evolves, is LED lumens, but we’ll go into that in more depth later. You may also see projector brightness described in lux with no other information to contextualize that measurement, which is another misleading marketing tactic.

Color Lumens

An important thing to note about the ANSI lumen standard is that it is measured using black and white video projections. Some projectors are listed with a Color Lumen Rating, which is important for picking a projector for projection mapping. Some projectors might measure high ANSI lumens, but when the same readings are taken on an RGB test pattern, they measure much lower. What this means for the consumer is that the color reproduction of that projector will not be very vibrant. Color Lumens are a good indicator of how vivid the colors of your projection will appear and should be as close or to the ANSI lumen rating as possible for the richest color quality.

Using Your Knowledge of Projector Brightness

Now that you have a better understanding of the many facets of brightness, you can select a projector with greater precision. To aid in that process, the Lightform Projection Mapping Calculator is a great resource to help you determine the brightness needed for your installation. For more information on projector brightness and selecting the right projector to use for your projection mapping project, read our blog on How to Pick a Projector.

~ Sean Servis

Note: 

As of August 12th, 2022, Lightform is no longer in business and is no longer providing technical support for the product. Please refer to the Lightform Guide and FAQ for self-help resources.

Lightform Compatible Projector: How To Pick a Projector

Compatible projector - How to pick a projector

Picking a compatible projector to use with the Lightform LFC to begin projection mapping can be daunting. To make it easier for you to get started, we’ve detailed what considerations you should consider when picking a projector. Recommending projectors can be tricky business as models change quite frequently, but these core features will help you get the most out of your Lightform LFC Kit.

The Basics

Choosing the right projector is going to revolve around brightness and image size. As brightness and image size increase, so does the price of a projector. As you begin your search for a projector to pair with your LFC, you should expect to spend at least $500 for a new projector. Top-of-the-line professional units can easily run into the tens of thousands of dollars, and large-scale projection mapping projects can employ dozens or even hundreds of these high-end units. As the number of available options continues to grow, selecting a projector has not become any easier. We hope to demystify some of the terms and features to help you effectively narrow down your search. Here are a few things to consider when selecting a projector for your LFC.

Table of Contents

Quick Tip: Helpful Resources

Here are a few resources we use internally to select the right projector for our projection mapping projects.

  1. Lightform’s Projection Mapping Calculator is a useful resource to help you determine the brightness necessary for your installation.
  2. Find a Projector search tool via the Projector Central website makes it easy to find a compatible projector for the LFC. We have pre-filled in the search tool with the HDMI and throw ratio requirements to narrow down your choices for finding a compatible projector for the LFC. 
  3. Projector Throw Distance Calculator via the Projector Central website helps determine image size and throw distance.

Projector Requirements

The LFC supports projectors that meet the following criteria:

1. HDMI Input

Your projector must have an HDMI input to work with the LFC Kit. The LFC’s HDMI port is responsible for transmitting video data and the projector’s EDID, or Extended Display Identification Data. The EDID relays different characteristics about the projector, such as resolution, timing, and refresh rates, which the LFC needs to communicate with the projector properly. Some powered VGA and DVI converters work with some projectors even though they are not officially supported.

2. Contrast Ratio, Black Levels, and Projection Mapping

The contrast ratio and black levels of your projector are one of the most important elements to consider for projection mapping. We recommend a minimum contrast ratio of 10,000:1, particularly if you intend to project anywhere relatively dark. Higher contrast ratios will give you better results, and greater flexibility in dark situations, but will also increase the price.

Why does it matter?

Traditional projection, whether in a cinema or in your living room, emphasizes a rectangular image frame. Projection mapping, on the other hand, turns any 3D surface into an image frame. Projection mapping is like many special effects and compositing techniques; it relies on black background areas to selectively illuminate your scene. No matter how your projector creates an image, it cannot produce or project darkness, it can only attempt to divert or block light from illuminating the dark areas of your image.

Projector compatibility - how to pick a projector
A scan in Lightform Creator with surfaces and effect.
Compatible projector - how to pick a projector
The published Lightform video being played by the projector.

Some projectors can block light better than others, which results in higher contrast images and deeper black tones. Projectors that do not block light as effectively produce flatter, more washed out images, especially in dark environments. In a cinema application, you have the option to use specialized high gain black screens to compensate for a low contrast ratio, but in most projection mapping situations, this will not be the case.

The contrast levels of your projector will affect how visible the edges of your image frame will be when projecting black video, and how much your projection will “pop.” If your projection is significantly brighter than the ambient lighting, this image boundary will be more apparent with a lower contrast ratio, particularly when projecting onto flat surfaces. You can always add more ambient light to compensate, but a higher contrast ratio will help avoid some of these situations and make your projections more vivid in general.

Projector compatibility - how to pick a projector
Visible projection frame in low light using an Epson 1060 with 15000:1 Contrast Ratio and 3100 lumens.
Unfortunately, contrast ratio is a projector specification that is obfuscated by competing measurement methods and exaggerated marketing. ANSI contrast measurements are a more reliable measurement but are not universally used. The contrast ratio is defined as the brightness of the projected white video compared to the projected black video. When you see 15,000:1, that means that the white video measures 15,000 times brighter than the black video. The higher the ratio is, the more contrast there will be. But again, these numbers are sometimes inflated in marketing materials, or low ratios might be accompanied by misleading images, so if you are in doubt, search the reviews and specs.

3. “Brightness” - Lumens and More

How bright does my projector need to be? – This is often the first question people ask. The answer depends on a few different factors that will be unique to each individual situation. What we often casually refer to as projector “brightness” is its Lumen rating. In most cases, the LFC supports almost any projector with any normal or short-throw projector with 1000-100,000 lumens. Generally speaking, the larger your scene and the brighter the ambient lighting is, the brighter your projector will need to be, and as the brightness increases, so does the cost. The more ambient light present in your scene, and the larger your scene is, the more light you’ll want your projector to produce.
It’s usually better to have too many lumens and have to turn the projector brightness down or add additional lighting, than it is to not have enough.

To better understand projector brightness there are a few other concepts to familiarize yourself with. There is more to brightness than just lumens. Learn more about the other elements of brightness in our blog about lumens, luminance, illuminance, flux, lux, and foot-lamberts.

We recommend using the Lightform Projection Mapping Calculator to determine whether a given projector produces enough lumens for your scene.

4. Throw Ratio and Lenses

At this point we’ve talked about lumens and lux and how they relate to the illumination levels of your projected image at different sizes, but we haven’t explained how to determine the size of your projection, or how close or far your projector can be to achieve that image size.

The projector lens is a central component of creating a projected image. Similar to camera lenses, projector lenses are designed for specialized uses. A lens that works in one scenario will be the wrong tool in another. Outside of large event and venue projectors, most projectors are manufactured to be used in medium and large rooms. Short throw projectors are made with wide lenses designed to be placed close to the image plane and create a large picture frame. Long-throw projectors are designed to be placed at a distance while still creating an equivalent size frame.

Short and long-throw projectors are determined by throw ratio. To fully understand how and why Lightform works with these different projector types, we need to understand what Throw Ratio is.

Throw Ratio is defined as the size of your projected frame in relation to the distance between your frame and the projector. Like any ratio, it’s a simple division formula, the width (W) of the image frame is divided by the distance (D) between the frame and the projector. You will sometimes see Throw Ratio, or TR, written as a traditional ratio (e.g., 1.5:1), but oftentimes TR specs will exclude the :1 at the end.

The lower the TR number, the wider the picture frame, or the shorter the projector’s throw.

A projector with a throw ratio of 0.5:1 will create a frame that is twice as wide as the distance between the projector and the wall; at a 1m distance, the frame will be 2m wide, at 1.5m distance, the frame will be 3m wide, and so on. A projector with a throw ratio of 2:1 at a 1m distance will create a 0.5m wide frame, at 1.5m, the frame will be 0.75m wide, at 2m distance, the frame will be 1m wide, etc.

Using Throw Ratio

Using the throw ratio equation and its variations is essential when selecting the right projector for your experience – it’s important to consider the positioning of your projector and the size of the image you’d like to project (or the size of the scene you’d like to cover). With the throw ratio equation, you can determine:

1. The ideal throw ratio given the setup of your experience

           TR = TD / IW

           (Throw Ratio = Throw Distance / Image Width)

2. Where to place a projector given its throw ratio & your projected image size

            TD = TR x IW

            (Throw Distance = Throw Ratio x Image Width)

3. The width of the image a projector will produce given its throw ratio & throw distance

            IW = TD / TR

            (Image Width = TD / TR)

Many projector lenses are capable of optical zoom. They don’t have a fixed throw ratio but rather an adjustable one to give you more flexibility to work within your space’s physical constraints. These will be listed as a range, usually with two decimal points (e.g., 1.21-1.56). The greater that range is, the less constrained you will be when choosing your projector’s physical placement, so if you want to make sure you have some flexibility in your installations, that number might be a little more important to you. When looking at higher-end projectors, many of them have interchangeable lenses, which will give you a lot of options to rent or buy lenses with different throws as necessary. Be aware that an interchangeable lens feature can drive up the cost of these systems as they are not always included with every listing.

The Lightform LFC Kit works with projectors having a wide range of throw ratios, from 0.5:1 (short-throw) to 2:1 (long-throw). Two factors determine the throw ratio range that is compatible with the LFC.

Field of View – Lightform LFC’s 4K camera reads a series of visible structure light patterns during the scanning process. At each stage of the scan pattern, Lightform is recording the position of every projector pixel it can see and determining its position within the scene. With short-throw projectors, the LFC’s camera field of view, or FOV, is the limiting factor. If the throw ratio is lower than 0.5:1, the projector image will be too wide for the LFC camera; if the projector image extends beyond the edge of the camera frame, the LFC camera will be unable to detect and register the light from the full scene on its sensor.

Camera Sensor – For long-throw projectors with a throw ratio above 2:1, the 4K sensor on the LFC camera defines the upper limit of optimal compatibility. Lightform Creator’s scans and projects have a maximum resolution of 1920×1200 pixels. Lightform LFC’s 4K camera sensor has a resolution of 3840×2160 pixels, or roughly four times as many pixels as it is responsible for recording during a scan. When the throw ratio of a projector exceeds 2:1, the projector image will be visible to less than ¼ of the available 4K camera sensor pixels (i.e. less than 1920×1200 pixels) resulting in a scan resolution that is lower than the projector’s native resolution.

It is possible to use Lightform LFC with out-of-spec throw ratios beyond the 0.5:1-2:1 range by moving the LFC closer or further away with a long HDMI cable, but ideally, the camera lens should be on the same plane as the projector lens. During the scanning process, the projector lens and the LFC camera lens are essentially acting as two eyes to produce stereo vision. As the difference between the two lens planes increases, the fidelity of the depth disparity data will decrease, which will result in some effects and selection tools not behaving as intended.

It is also possible to modify the LFC camera to accept C and CS mount lenses, which will allow you to change the camera’s field-of-view to better match an out-of-spec throw ratio. This will give you better results than moving the LFC camera, but the conversion and lens will cost more than a long HDMI cable.

5. Throw Distance

Throw distance is the minimum and maximum distance your projector will project in focus. The focusing range of your lens constrains your physical placement options. The minimum distance is how close your projector can be without being out of focus, and the maximum is how far you can be without losing focus.

This does not mean that everything between those extremes will be in focus. How much of that given range will be in focus will vary from projector to projector. If you plan on video mapping a scene with a lot of depth, you’ll want to look for a projector with a larger focal range. In general, projectors are designed to create an image on a flat plane, so this isn’t really something that most listings mention, but often time longer throw ratios will allow for more of the projection to be in focus at one. Most short-throw and ultra-short-throw projectors have very limited focal distances, they are great for planar images close to a wall, but are not designed for scenes with depth.

6. Resolution and Aspect Ratio

Like cameras, televisions, smartphones, and pretty much anything with a screen, projectors come in a wide range of resolutions. Resolution is defined as the width and height dimensions of a digital image in pixels. A pixel is the base unit of modern digital imagery, a discrete point of color and brightness that can be individually addressed as one small part of the larger total image. The higher the number of pixels you have to work with, the more detailed your images will appear.

As you research projectors, you will encounter resolutions listed both in pixel dimensions and also their marketing equivalents, VGA (640×480), SD (720×480), HD (1280×720), Full HD (1920×1080), WUXGA (1920×1200), 2K (2560×1440), UHD/4K (3840×2160) and a few others.

Lightform is compatible with a wide range of projector resolutions and will generate scans and published projects with a resolution up to 1920×1200 (WUXGA). Higher resolutions are one of the features that will bring up the overall cost of a projector and may be worth considering if you intend to work on large scenes or with small text.

While a published Lightform project is limited to 1920×1200, many projectors with greater resolutions can upscale HD video to an approximated 4K image, which will look great with Lightform Creator effects. If you have room left in your projector budget for a projector with 4K upscaling, you will benefit from an overall crisper image with the increased pixel density, particularly if you intend to work with very large scenes.

7. Pixel Density

The screen you’re reading this on likely has an incredibly dense pixel array, no matter what its resolution is. More than likely, it’s at least 1920×1080, if not higher, but those pixels are so small that you can’t distinguish them individually without magnification. Digital projectors create images in standard video resolutions but enlarge them with optical lenses. As a result, individual pixels are much larger than on a phone or monitor. They are more readily perceived at close distances, a phenomenon known as the “screen door effect” because the space between pixels resembles the grid mesh of a physical screen door.

Most large-scale projection mapping projects maintain pixel density by blending multiple high resolution projectors together. If you’ve ever seen video mapping on a large building facade, the total resolution of that projection is significantly larger than any individual projector is capable of producing. Instead, hundreds of thousands of dollars worth of high-end projectors are combined using software to create one enormous seamless image.

The process for a large scale Lightform project is much simpler, but since you won’t be blending multiple projectors, having the highest resolution projector you can afford will give you better pixel density. The more individual pixels you can fit on your projection surface, the more detailed your projections will appear. Viewing distance will also impact perceived resolution as projected experiences viewed from a short distance will reveal pixel density shortcomings. Conversely, projected experiences viewed from further away will conceal pixel density shortcomings like lower resolution billboards viewed from afar.
Pro Tip: It is also possible to mitigate the screen door effect by softening the optical focus of your projector lens, but be sure to keep your projector focused while taking a Lightform scan. Throwing the lens further out of focus can turn your projection into an even more ethereal experience if your content allows for it.

8. Lamps, Lasers, and LEDs

Lamps, laser and LED engines are systems that use optics to split a beam of white light into different colors. Any number of lamp types can create white light (there are quite a few varieties at this point) but they all need replacement after a few thousand hours. For the budget-conscious projector hunter, this means that you can sometimes find used projectors for sale or auction at a steep discount that only need a new lamp installed. However, the newer Laser and LED light sources have some distinct advantages.

Instead of splitting white light into three channels, these projectors start with the RGB channels already separated. In other words, they can reproduce more accurate and vibrant colors with higher contrast. They are also more power-efficient, brighter, and less light is lost to the color-splitting optics resulting in higher contrast and darker blacks. On top of that, they do not require lamp replacements. Most traditional projector lamps have a life expectancy of a couple of thousand hours and have to be replaced. Laser and LED projectors, on the other hand, are usually rated to last around 20,000 hours or more, saving time and money on maintenance.

Laser projectors have also breathed life back into the 1 Chip DLP system. Since they create RGB channels at the light source instead of needing a spinning color wheel, the Rainbow Effect – an artifact of the rapid switching between color channels, where you may see flashes of color in parts of the image with quick movements or high contrast – is no longer an issue, so if you see a 1 Chip DLP Laser projector, it might suit your needs just fine.

Some Laser projectors use a Laser Phosphor as a light source, which still relies on mirrors and color wheels to create an image. A blue laser (and sometimes a second red laser) hits a phosphor wheel, which creates yellow light when the laser photons collide into it, and that yellow light is then routed through the optical engine. These projectors don’t have all the color reproduction advantages of RGB Laser and LED systems but are still brighter and more efficient with no bulb replacements.

LED projectors create vivid colors, but their brightness is hard to qualify. They take advantage of what is known as the Helmholtz-Young effect when the human eye perceives highly saturated color as luminance. To a light meter, an LED projector won’t read as very bright, but their low lumens go a long way as the human brain interprets what is seen as brighter by two or three times the actual lumens. Many LED projectors are sold using marketing LED lumens, an estimation of how many lumens your eyes will see, to counter the low ANSI lumen spec. But there is no standard point of comparison for this so take everything you see with a grain of salt and read the reviews.

9. Imaging Chips

Digital projectors use one of two kinds of imaging chips to turn the video signal from an HDMI cable into a projected video image, 3LCD and DLP. With a couple of exceptions, they will both provide good results with Lightform.

3LCD projectors use dichroic mirrors to channel red, blue, and green light through three small Liquid Crystal Displays, then recombine the color channels with a prism or microlens array, and then project a full image out of the front lens. Each Liquid Crystal corresponds to a pixel; applying electricity to a liquid crystal changes its polarization to control the amount of light that passes through it. Some people find that 3LCD projectors tend to reproduce richer colors, but there is a lot of variance. Keep in mind that a Color Lumen rating similar to the ANSI Lumen rating indicates that a projector will have vibrant color reproduction.

DLP, or Digital Light Processing Chip, creates an image using a DMD, an array of thousands of micro-mirrors that can switch very rapidly between reflecting light towards or away from the lens. Unlike a Liquid Crystal, the micro-mirrors on a DLP chip are a binary on/off output. To create the correct gradations of brightness, multiple mirrors will be assigned to one image pixel, or the mirrors will switch on and off faster than the refresh rate of the video.

The earliest DLP systems used a single Chip DLP configuration, dividing white light into red, green, and blue with a color wheel and then reflecting each color channel off a single DMD one after another. Because the colors are flashing rapidly between color channels instead of being recombined, 1 Chip DLP projectors with a color wheel are prone to the previously discussed Rainbow Effect. Not everyone experiences this the same way, but it will show up on video recordings and still photos. Searching projector reviews for Rainbow Effect is a good habit to get into, and it’s recommended one avoid 1 Chip DLP projectors with color wheels.

3 Chip DLP projectors replaced the spinning color wheel, to eliminate the Rainbow Effect, with dichroic mirrors. Each color channel is directed to a dedicated micro-mirror array simultaneously, similar to the 3LCD configuration.

10. Vertical Offset

Vertical Offset is another feature of projector optics to be aware of when picking a projector. Most projectors are designed to sit on a surface or hang from a ceiling and create a rectilinear frame towards the center of a wall. To account for this, many of them have a 100% Vertical Offset (i.e., shifting the projected frame slightly higher versus directly straight ahead). With a 100% Vertical Offset the bottom of the projected frame will line up with the center of the projector lens, and the top of the projected frame comes out of the projector’s lens at an upward angle. A 0% vertical offset means the beam goes straight out of the lens like a flashlight and the center of the projector frame is in line with the projector lens.

Some projectors have more extreme offsets for particular situations. Higher-end projectors often have a Lens Shift feature, which will allow you to change the Vertical Offset and Horizontal Offset allowing you to move the frame around without distortion. Lens Shift is a great feature to have in physically constrained installations. You can make a vertical offset work to your advantage by installing projectors upside down and illuminating your scene from above. Minimizing occlusion of the projection as people pass in front of the projection surface makes ceiling-mounted projectors a favored installation approach in traditional situations as well as indoor projection mapping

Final Thoughts

There are many factors to weigh when purchasing a projector, and we by no means have covered them all, but we’ve found these have the greatest impact on successful use of Lightform projection mapping. To learn more about specific projectors we recommend conducting research at projectorcentral.com. If you’d like to learn more about Lightform we have several articles in the Lightform Guide that can help you bridge this knowledge to use of Lightform products.

~ Sean Servis

Note: 

As of August 12th, 2022, Lightform is no longer in business and is no longer providing technical support for the product. Please refer to the Lightform Guide and FAQ for self-help resources.

Lightform LF2 Example Installations: Transforming Small Spaces with Projection Mapping

Lightform LF2 Example Installations

Utilizing projection mapping to creatively transform small spaces has become a lot easier with the introduction of the Lightform LF2 AR projector. Designing projections with Lightform Creator in tandem with the LF2 projectors’ built-in Lightform technology simplifies the process of projection mapping and saves time compared to traditional methods. A streamlined projection mapping process leaves more time for Lightform users to focus on their creativity and art. Inspired by our customers’ creative use of the LF2, we’ve shared some noteworthy Lightform LF2 examples that we hope inspire you.

Household Furniture & Decor

Jeff Teague, a Lightform user in New Mexico, used his LF2 AR Projector to produce an immersive light-show on a Byobu folding screen. He made use of the intricate patterns on the screen to align his projections and employ effects to trace the partitions’ borders and create eye-catching animations using the effects library in Lightform Creator.

In a similar fashion, Lightform user Vi Tran uses the LF2 to projection map sheer curtains, displaying nightly shows to cheer up her neighborhood during quarantine. Vi Tran, aka Cleo Patra, is an exhibit designer with an abundance of creative energy. She has published numerous projects, ranging from a psychedelic Easter Bunny to celebrity self-portraits, and paintings by Shepard Fairey, Vasarely, Dali, and many more artists. You can find more of her work on her website, Applied Curiosity

Wall Art & Paintings

Wall art is among many Lightform users’ favorite items to projection map with the LF2. Here is a great LF2 example by Dave Coughlan. Earlier this year, Dave’s partner gifted him with an LF2 as an early Christmas present, which he used to projection map his wall art (for the first time) in less than an hour.

Lightform user Rick Morrison used his LF2 to projection map his 3D logo (6.5”) as well as a cat painting by Sketchy Eddie of Nova and Loki (30w x 20h”). To find more of Rick’s augmented reality projections via Lightform, visit his Facebook Page, Aw Jeez – Flow Arts

Cat Painting LF2 Example

3D Sculptures

Sculptures are another popular projection mapping object among our users. Christian Onofrei’s first LF2 project was done by creating a low-poly paper lion head paired with audio reactivity, making his LF2 projection react to audio. “I am very excited about Lightform! It allows me to put my design skills into a new realm,” shares Christian. You can find more of Christian’s work on his YouTube channel, Chris tries Mixed Media, or his Instagram, @chris.mixmedia.

Artist Dan Lam’s sculpture is another creative LF2 example showcasing the transformation of still art into augmented reality. Dan brought her unique sculpture made of polyurethane foam, resin, and acrylic to life with the LF2. The combination of overlayed effects on her 3D sculpture via Lightform Creator software adds another level of visual punch.

Hobbies & Other Objects

Because Lightform is capable of scanning environments in minutes, some Lightform users experiment with their LF2 by quickly scanning objects around the house, including hobby items. Manfred H. Launer was able to scan his skateboard in under 10 minutes on his first try.

Andrea Zavareei, an experienced user of the Lightform LFC, is VP of Ops at King Integrated Solutions, Inc., a corporate AV and video-conferencing company based in Brooklyn, NY. After receiving his Lightform LF2, he immediately set it up and projection mapped his Moog Music Workstation. He took some video clips of it and matched it up with original computer music he made circa 2000. Find out more about Andrea’s work on his website

Latoya Charisse Flowers, a multimedia producer at the Carve Capture collective, used the LF2 AR projector to create her first Lightform experience called ‘Travel with Time.’ The clock served as a blank canvas to display generative spheres. She wanted to achieve mesmerizing effects in circular motions while keeping a minimalistic design. Latoya used X Particles via Cycles 4D and enhanced the color treatment in After Effects before importing her content into the Lightform Creator software to achieve her clock’s unique digital effects. Learn more about how Latoya incorporated projection mapping on her website, Latoya Charisse Flowers

DIY expert, Chip Wade from Fox and Friends, used his LF2 to demonstrate how to decorate for the holidays without the hassle of hanging lights. He added his LF2 light display to a custom, wood cutout art piece in his house, bringing his wall art to life.

Although the LF2 is popularly used for indoor projects, it can also be used for small, outdoor setups as well, including porches, balconies, and outdoor deck areas. If you plan to install an LF2 project outdoors, we recommend using an LF2 Outdoor Enclosure to keep your Lightform in a fixed position while ensuring its safety from mild outdoor elements or theft.

Do you have other LF2 examples you’d like to share or thought of an LF2 example that’s not listed in our blog? Let us know and comment below or share your creative work by tagging your post with #lightformcreations on social media.


Note: 

As of August 12th, 2022, Lightform is no longer in business and is no longer providing technical support for the product. Please refer to the Lightform Guide and FAQ for self-help resources.

Holiday Projection Mapping Ideas

Holiday Projection Mapping Ideas

Say goodbye to traditional holiday lighting. This year, we’re taking a fresh approach to the usual winter festivities and revamping holiday decorations with Lightform’s projection mapping. Whether you’re sprucing up existing holiday decor – or have no decor at all – use Lightform’s projection mapping tools as a standalone, all-in-one source of holiday entertainment or use it to transform your end-of-year holiday displays. Get the creative juices flowing this December with these creative, holiday projection mapping ideas.

Transform Your Walls

Nothing sounds sweeter than a Christmas choir harmonizing Silent Night…unless there’s a cat in a Santa hat slamming piano chords on a living room wall projection! With the addition of the new Storyblocks feature in Creator 1.11.13, you can now peruse 900k+ videos to projection map not just your Christmas tree but your blank living room wall as well. Transform your wall into the ultimate holiday canvas and project anything from Santa-hat-cats to cozy fireplaces as a winter backdrop.

Add Snow...Digitally

Enjoy a digital winter snowfall from the warmth of your room. Upload your own assets or use Lightform Creator’s built-in-library of effects to customize your holiday projection mapping setup. Use your custom projections combined with classic string lights to give your lighting decor an extra boost of holiday glow.

Projection Map A Fireplace

Light up the winter nights with a cozy fireplace projection. Lightform user Corey Callahan uses his Lightform LFC Kit to create a Christmas scene. Corey lined up the fireplace projection to strategically cover his AC and added an overlaying fire effect to bring additional movement to his flames. His projected furnace is complimented with a green, projection mapped Christmas tree (originally white) for a complete, snowed-in cabin feel.

Dining & Furniture

Holiday projection mapping doesn’t have to be limited to traditional holiday decor. Some users in the Lightform community have found ways to highlight unique dining elements. For instance, Lightform user Jérémy Carre uses his LFC to map a geometric wine rack – perfect for showcasing a wine collection for holiday dinners.

House Mapping

Another popular object for holiday projection mapping is house projection mapping (AKA house mapping). Just as popular as it is for Halloween, many people in the Lightform community like to projection map the front side of their house for the winter holidays. In order to projection map your entire house, we recommend pairing the LFC Kit with an external projector to capture a full-house scan. You can find the details of a compatible projector to use with the LFC Kit here. Smaller, outdoor scans of 6-12 feet can be done with an LF2 AR Projector in very low, ambient light to dark scenes, but we don’t recommend using the LF2 for whole-house projections. Outdoor projection setups may also need some extra preparations. Keep your LF2 unit in an outdoor enclosure to keep it safe from theft and mild weather. Here is a full-house projection that one of our Lightform team members, Anum Awan, created to inspire you.

Dioramas

Dioramas are also among one of our users’ favorite holiday displays to projection map during this time of the year. Lightform user Chris Sardinas uses Lightform to light up this mini holiday neighborhood in his “Christmas Village” display.

Share Your Holiday Projections

Getting festive can look a lot differently for Lightform users who are using projection mapping to create their holiday decor. From house projection mapping to dinner displays, we hope these ideas stir up your creativity for the holidays. Have you thought of a holiday projection mapping idea we didn’t include? We’d like to hear from you – or better yet – see what kinds of holiday creations you’re whipping up this winter. Comment below or tag us with #lightformcreations on social media for a chance to be featured on our social channels.


Note: 

As of August 12th, 2022, Lightform is no longer in business and is no longer providing technical support for the product. Please refer to the Lightform Guide and FAQ for self-help resources.

Behind the Scenes: Conservatory of Flowers – Event Projection Mapping

Lightform at Night Bloom - Event Projection Mapping

It’s no secret here at Lightform – we absolutely love projection mapping on plants. You can imagine our excitement when we were asked to bring our technology to San Francisco’s historic Conservatory of Flowers for their winter light show Night Bloom. Many botanical gardens and arboretums hold holiday light shows during the darkest months of the year, recently some have begun to employ projection mapping  alongside more traditional lighting elements.

A few months before the Night Bloom installation began, we brought a 7k lumen Epson G7500 and an LFC beta unit to do some demos and tests in the space. The Conservatory of Flowers has a large outdoor area with manicured lawns, flower beds, and sculptures, but inside its main structure, a sprawling 140-year-old greenhouse, room after room of tropical and subtropical plants thrive. The gift shop at the end of the circuit features a large, lovingly maintained living wall about 3 meters tall and 5 meters wide, which turned out to be our best option for both the simplicity of the mapping and the fact that the watering routine in that particular room was far safer for our equipment.

What we learned in our mid-summer tests as the late afternoon sun came through the greenhouse was that plants absorb light like their lives depend on it, especially the ones with waxy, dark, green leaves. With the projector about 6 meters from the plant wall, we were able to scan and project, but the darker colors of our projection seemed to disappear in the foliage even as the sun dipped below the trees outside. Nonetheless, the botanists who had been tending the plants were excited to see the leaves coming to life and stuck around to watch after their workday was over.

We decided to install our most powerful projector with the LFC Kit on the living wall for maximum effect throughout Night Bloom’s multi-week run. With 12k lumens and a high-contrast 3-LCD laser light engine, the Epson L1505u has done a lot of heavy lifting on many of our large-scale projection mapping projects. With the amount of foot traffic in the gallery, and sprinkler systems just above head height, hanging the projector overhead was the best option for the space. Because the Conservatory’s white-painted glass and redwood greenhouse is a historic structure, there are only a few specified rigging points in the building, and while they’re usually only used to suspend potted plants, they are rated for hanging more than a ton of equipment.

Rigging points above the irrigation system - Night Bloom Event Projection Mapping
Rigging points above the irrigation system.

Those rigging points were not in the most convenient to place to reach, or in a good spot for our projection angle, so we suspended two lengths of aluminum speedrail pipe from the rigging eyes with aircraft cable, which gave us new rigging point facing the living wall just above everything in the space that could potentially cast shadows. Adding a cage to our big event venue projector brought its total weight to just below 100lbs (45kg), well within spec, and allowed us to hang it from the speedrail using slings and shackles. When rigging a projector for any projection mapping project, rigidity is a huge concern, any movement near your projector will translate to your whole image, so eliminating vibrations and swaying at the source is critical. Hanging a projector from several lengths of cable may seem counter-intuitive, but with enough weight, many points of contact, and the immovable structure of this old building, once the projector settled into position it was incredibly stable.

Night Bloom Event Projection Mapping - Tilt controls on projector’s cage
Tilt controls on our projector’s cage allowed us to adjust the position after flying it.

The living wall, by contrast, was quite dynamic. Dozens of individual plants of all different species, all growing at different rates, being pruned back, or handled by attendees, meant that throughout Night Bloom’s run we had to take a new scan at least once or twice a week. This presented us with a great real-world opportunity to test the Lightform Cloud remote scan and deploy features that we were beginning to develop, not that we didn’t take advantage of the opportunity to work on-site in this beautiful venue from time to time as well. 

One of the areas where Lightform Creator excels is in quickly augmenting complex organic textures and creating ambient environmental projection mapping shows. To keep maintenance to a minimum, we created one single surface, a simple vignette mask that covered the entire living wall with a soft feathered border, and let the software’s reactive effects do the rest. We used just about every scan-driven effect in Creator, some of our favorites repeated multiple times with different settings, until we had over 30 slides, each between 30 to 60 seconds long.

That’s a lot of video to render multiple times a week, so we took advantage of the LFC’s ability to run one effect per slide live on the device. This wouldn’t have saved us as much time if we needed to have multiple surfaces and effects on each slide, but when you’re projection mapping onto an intricate and detailed subject, like a living wall, or a mural, a single Creator effect can go a very long way, and it meant that we could take our scans in ideal lighting conditions during magic hour and have the updated show running before Night Bloom’s doors opened in the twilight.

As if that wasn’t a dynamic enough projection mapping situation, we also decided to install a Lightform on a smaller 3100 lumen Epson 1060 home cinema projector and illuminate an operational fountain. A few different species of pond grasses floating on top of the water helped absorb some of the ripples and wavelets from the flowing water. What was not immediately apparent during our tests was that the pond grasses were replenished every few days as they disappeared into the belly of a large Koi named Frank. Not to worry, as Frank gorged himself and the mapped grasses moved out of alignment or through Frank’s GI tract, knee-deep water scattered our projector beam in all directions. The refractions and reflections of our Creator effects as they hit the fountain enhanced the ambiance just as effectively as if they had been freshly mapped.

Every night for six weeks, hundreds of attendees walked through an entirely transformed space created by Lightform and Lightswitch, experiencing colored mood lighting and laser beams interacting with exotic plants in new ways, and for many, experiencing projection mapping for the first time. One particularly enthusiastic child sat themself down in front of the living wall at the end of the exhibit and loudly declared, “I could watch this for hours!” The adults may have shown more restraint, but all generations shared the sense of wonder, and our friends at the Conservatory of Flowers were beyond pleased with the installation and excited to begin expanding the use of projection mapping in their after dark event schedule. See the full video of the Night Bloom event on our Instagram.

~ Sean Servis

Note: 

As of August 12th, 2022, Lightform is no longer in business and is no longer providing technical support for the product. Please refer to the Lightform Guide and FAQ for self-help resources.